
Help center › Getting started
Add users, roles and PINs
Give every employee their own user. That way you know who sold, who collected and who approved each action.
Add a user
- Go to Settings → Users and tap + Add User.
- Enter the employee's Full name and Email. Diego sends them a welcome email to create their own password.
- Give them a Quick access PIN of 4 to 6 digits.
- Choose the Role and tap Create User.
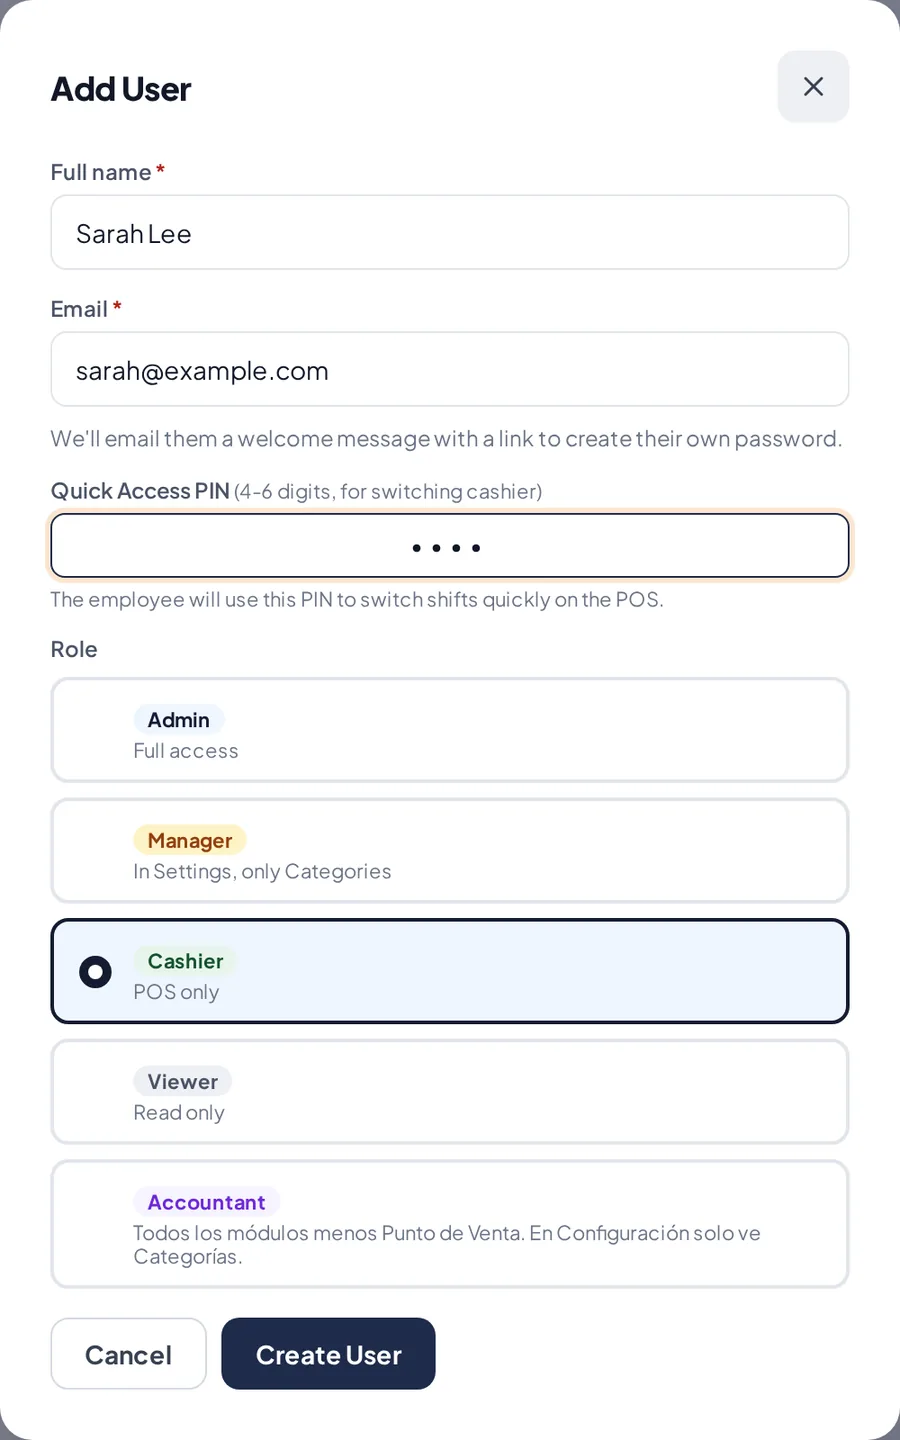
Add User: name, email, PIN and role.
What each role can do
- Admin: full access, including settings and users.
- Manager: sells, manages inventory, invoices and reports, and approves with their PIN. In Settings they only see Categories.
- Cashier: Point of Sale only (and Tables in restaurants).
- Accountant: every module except Point of Sale and Tables.
- Viewer: read-only access to orders and reports.
- Waiter and Kitchen (restaurants only): take orders from a phone and use the kitchen screen.
Change permissions or a PIN
- On the user's card, tap Edit to change their PIN or turn modules on and off. Then save the permissions.
- In the Roles & Permissions tab you change what a whole role can see; each module saves as you tap it.
- If the employee didn't get the email, tap Resend welcome.
Related articles
Still have questions?
Write to us and we'll reply within one business day.