
Help center › Restaurants
Set up your tables and seating areas
If you chose Restaurant as your business type, your menu has Tables, Menu and Kitchen. Start by creating your tables from a computer or tablet.
Create the tables
- In the menu, tap Tables, then New Table.
- Enter the Name (for example "Table 1" or "Bar"), the Capacity (seats), the Seating area and the shape: Square or Round.
- Tap Create Table. Repeat for each table.
Group them by area
- Tap 🏠 Areas. Type a name (for example "Patio") and tap + Add.
- Tap an area to switch to it. Once you have two or more areas, they show as tabs above the map.
Lay out the floor plan
- Tap ✏️ Edit Map and drag each table into place. The position saves when you let go.
- To delete a table, tap the red × while editing.
- Tap ✓ Save Map when you're done.
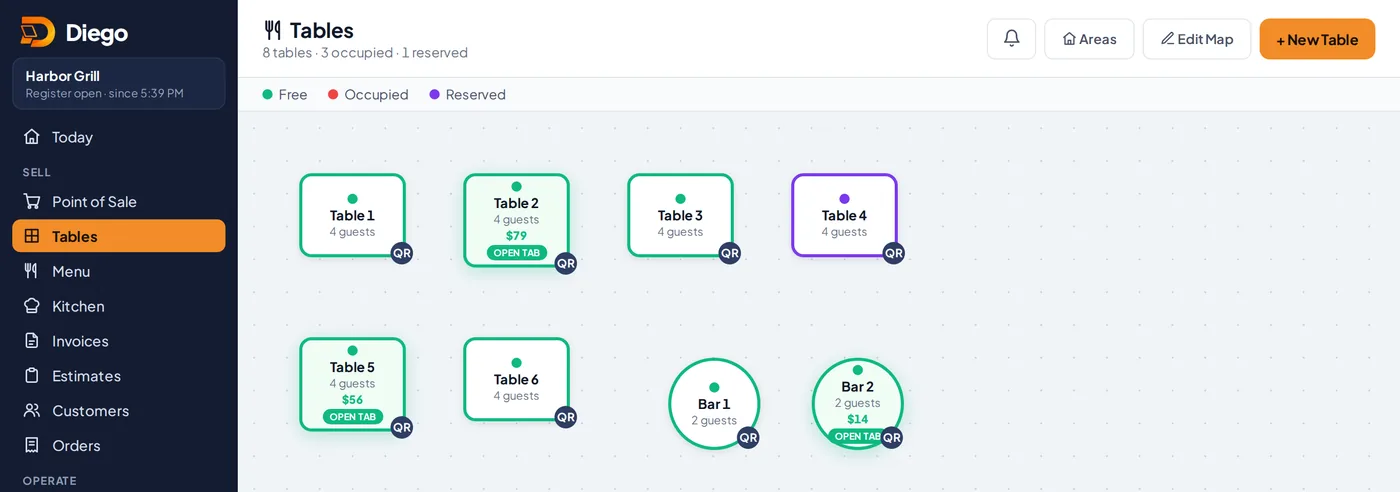
The floor plan with free and occupied tables.
Related articles
Take a table order and send it to the kitchenOpen a table, add dishes for the whole table or by seat, and send the ticket to the kitchen.Charge a table: full check, by seat and tipCharge the full check or by seat, add the tip and choose the payment method.QR menu: guests order from the tablePrint each table's QR code so guests can see the menu and send their order from their phone.
Still have questions?
Write to us and we'll reply within one business day.